Getting started with Push Notifications in iOS
This is the first part of the three part blog series of push notifications functionality in Apple devices that helps you in getting started with push notifications in iOS including the concepts of push notifications, its functionality, its key takeaways and limitations. The second part of the blog series focuses on configuration aspects of push notifications, while the last part of the series talks about configuration aspects of push chat.
Introduction
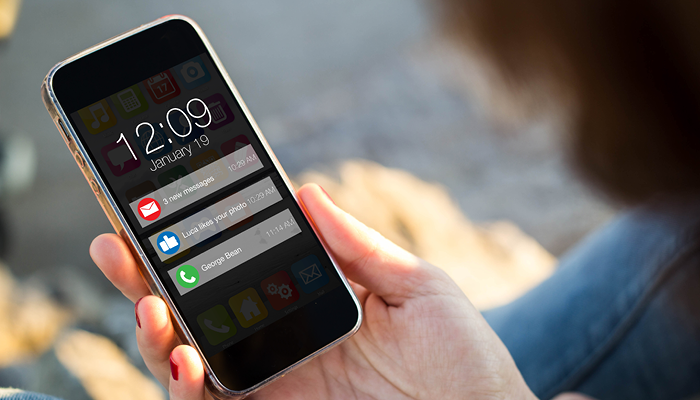
Push notifications enables your application to notify a user of new messages or events, even when the user is not actively using your application. On Android devices, when a device receives a push notification, your application’s icon along with a message shows up in the status bus. A push notification is a short message that consists of the device token, a payload and a few other bits and bytes.
Thus push notification technology is quite common for smart phone users, though there might be certain variations from application to application or from one phone model to another one.
Why do you need push notifications?
In iOS, apps have limited functionality to process everything in the background. Apps are only allowed to perform a limited set of activities to ensure that the battery life is conserved. However, in certain instances, when something intruiging happens and you wish to let the user know about this, even if they are currently using your app, then how will you go about it?
To take care of such instances, Apple provided a solution, wherein instead of your app continuously checking for events or doing background processing, you can write a server-side component to do this instead.
This implies that when an interesting event occurs, the server-side component can send a push notification, which can do three things:
- Display a short text message
- Play a short sound
- Set a number in a badge on the app’s icon
This blog lets you understand how to make a simple app that uses Apple push notification service (APNS). The first step to accomplish this is to configure your app to receive push notifications and test message.
How push notifications work? (A brief overview)
Getting push notifications to work on your app is a bit tedious and a challenging process, though you may ultimately relish and enjoy your fruits of labour.
It consists of a series of stages, which is outlined in the following figure:

- The app enables push notifications, wherein the user has to confirm whether he intends to receive these notifications or not.
- Upon confirmation, the app receives a “device token”. You can assume this device token as the address that push notifications will be sent to.
- The app sends the device token to your server.
- If an interesting event occurs in your app, the server sends a push notification to the APNS.
- APNS sends the push notification to the user’s device.
Once the user’s device receives the push notification, it displays an alert, plays a sound and/or updates the app’s icon. The user has the flexibility to launch the app from the alert itself; the app has the information of the push notification and can handle it as it sees appropriately. Now a question might arise in your mind? Do we still need push notifications in the age of local notifications and multitasking?
Local notifications have certain limitations, wherein they are solely meant to scheduling timed events and unlimited background processing in only available to apps that process VOIP, navigation and background audio. However, if you still want to notify the users about external events, while the app is closed, you still require push notifications.
Pre-requisites for configuring push notifications:
To configure push notifications on your app, you need to ensure the following requirements:
- An iPhone or an iPad: You need to test push notifications on your device, as they do not work in the simulator.
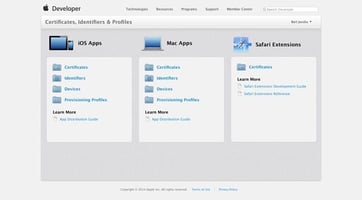
- An iOS Developer Program membership: You have to make a new App ID and provisioning profile for each app that uses push and at the same time, make an SSL certificate for the server. You can accomplish this at the iOS provisioning portal.
- A server that is connected to the internet: Since push notifications are always sent by a server, you need to have a server that is connected to the internet. For development, purpose, use your Mac as the server and for production use, you need virtual private server (VPS) like Linode.
How does a push notification look like?
Payload, which is part of a push notification is the most important aspect that we would be interested, as it consists of the actual data you will be sending across.
Your server should provide this payload as a JSON dictionary. The payload for a simple push message will be displayed like this:
{
"aps":
{
"alert": "Hello, world!",
"sound": "default"
}
}
There are myriad ways to configure the JSON payload like you can change the sound that is played, provide a localized text and you can even insert your own fields. Push notifications are intended to be small with payload size not exceeding 256 bytes.
Some key limitations
- Push notifications are not reliable:
There also seems to be a possibility that push notifications might not be actually delivered, even if the APNS server accepts them. You cannot track the status of the push notification, once you have sent it to APNS. The delivery time may also vary – from seconds to even up to half an hour.
There might be some other instances like the user’s iPhone may not be able to receive push notifications all the time. They could be on a WIFI network that does not allow connections to be made to APNS, since the required ports may be blocked or the phone could be switched off. APNS attempts to deliver the last notification it received for that device when it reverts online, but it will only try for a limited period. Once it times out, the push notification will be lost forever!
- They can be an expensive proposition:
Incorporating push functionality to your app is fairly easy and inexpensive if you own the data; however, if you a lot of users or data you need to poll, it may become a costly proposition.
- Requirement of a certificate for APNS
In order to enable push notifications in your app, it needs to be signed with a provisioning profile that is configured for push. Apart from that, your server needs to sign its communications to APNS with an SSL certificate.
The second part of this blog series outlines the functionality and procedures for configuring the push notifications on your iPhone or an iPad.
If you would like to request a demo of Innovapptive's Native, HTML5 or Hybrid apps, please click on the link/button. Alternatively, if you would like to discuss with an Innovapptive solution expert, you can reach out to us by emailing us at sales@innovapptive.com or you can reach a sales representative at (713) 275-1804.![]()